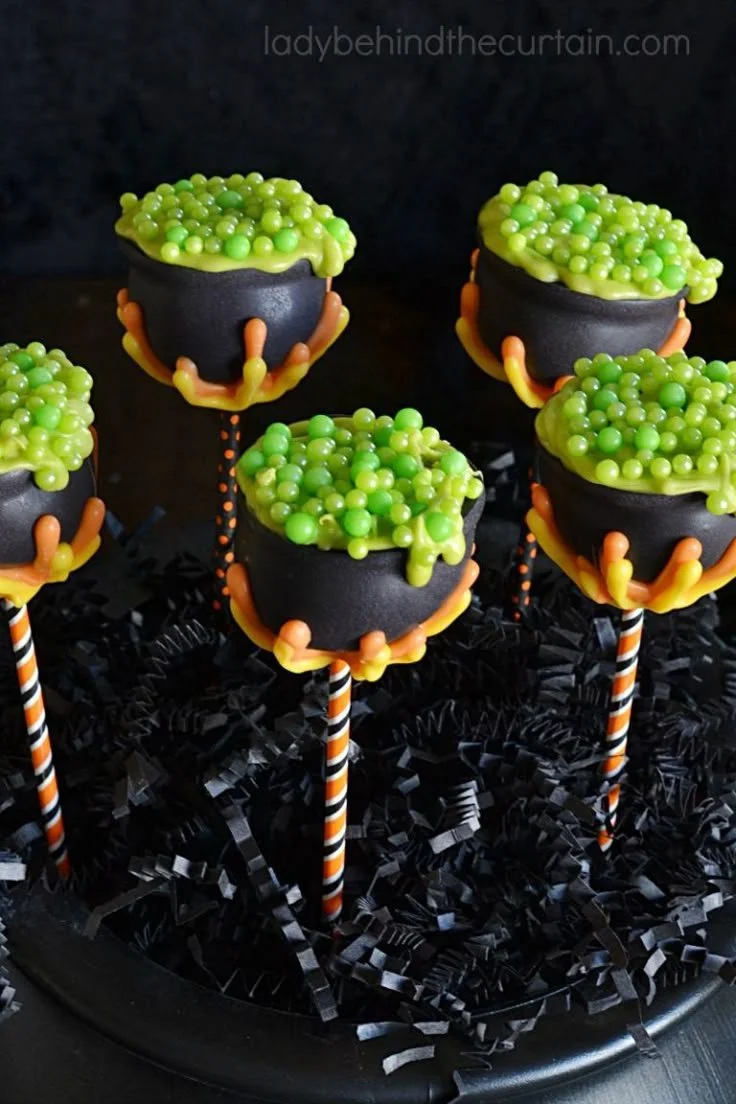
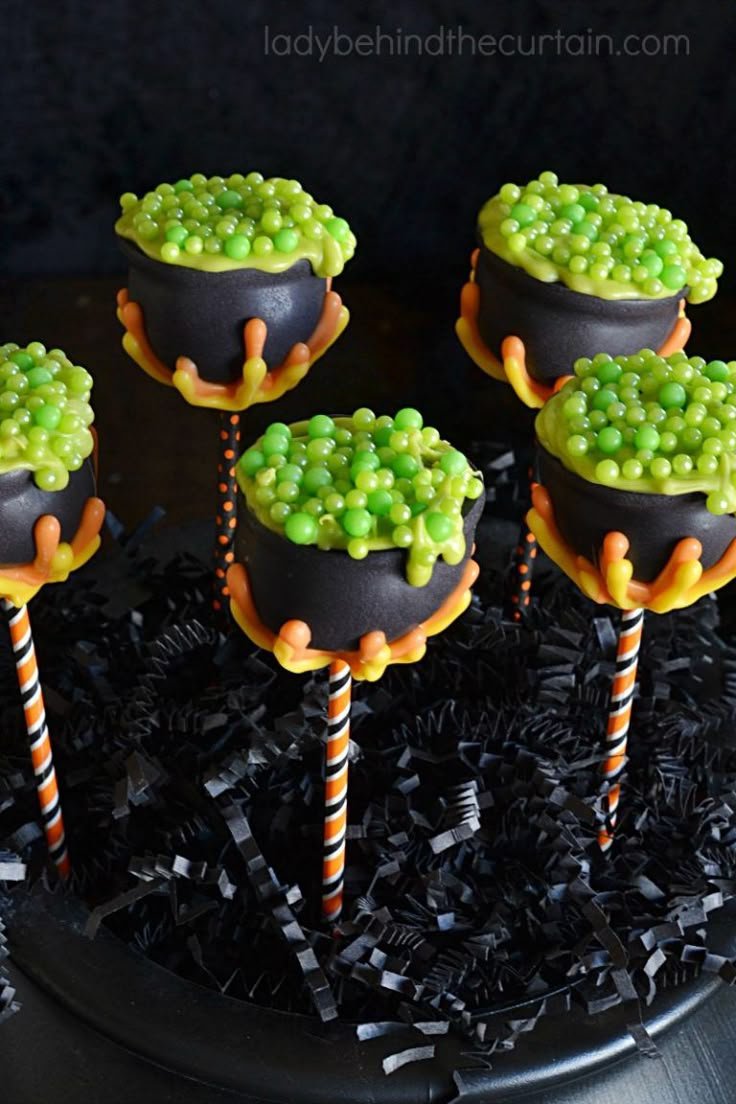
Witches Cauldron Cake Pops are a whimsical and delicious treat perfect for Halloween or any spooky celebration. These fun cake pops are not only easy to make but also allow you to get creative with your decorations. With their vibrant colors and festive appeal, they are sure to be a hit at any gathering. Whip up a batch and let the fun begin!
Why You’ll Love Witches Cauldron Cake Pops
- Simple Steps: This recipe uses a box cake mix and frosting, making preparation straightforward even for beginner bakers.
- Customizable: You can choose your favorite cake and frosting flavors, allowing for endless possibilities to suit your taste.
- Fun for All: These cake pops are a hit with both kids and adults, making them perfect for parties, Halloween gatherings, or family celebrations.
- Eye-Catching Presentation: The vibrant colors and festive design of these cake pops make them an attractive centerpiece for any dessert table.
- No Special Equipment Needed: You can easily make these cake pops without any fancy kitchen tools, just a baking dish and some basic supplies will do.
Recipe Overview
- Prep Time: 30 minutes
- Cook Time: 25 minutes
- Total Time: 1 hour
- Servings: 12 cake pops
- Difficulty Level: Easy
Ingredients You’ll Need for Witches Cauldron Cake Pops
- 1 box of cake mix (any flavor): Your choice of flavor adds a personal touch.
- 1 cup frosting (matching the cake flavor): A matching flavor helps maintain consistency in taste.
- Chocolate candy coating: This is the base for coating the cake pops.
- Black candy melts: For drizzling over the top.
- Green sprinkles or edible glitter: Adds a magical touch and festive flair.
- Cake pop sticks: For easy handling and serving.
- Small cauldron-shaped containers (optional): Perfect for a fun presentation of the cake pops.
How to Make Witches Cauldron Cake Pops
-
Bake and Cool the Cake
Bake the cake according to the box instructions. Once done, allow it to cool completely. -
Crumble the Cake
Crumble the cooled cake into a large bowl until it resembles fine crumbs. -
Mix with Frosting
Add frosting gradually to the crumbled cake. Mix until the texture is moist enough to form into balls. -
Shape the Cake Balls
Roll the mixture into small balls, about 1 inch in size, and place them on a baking sheet lined with parchment paper. -
Melt the Chocolate Coating
Melt the chocolate candy coating according to the package instructions until smooth. -
Prepare the Sticks
Dip the end of each cake pop stick into the melted chocolate, then gently insert it into the center of a cake ball. -
Coat the Cake Pops
Dip the entire cake ball into the melted chocolate, ensuring it’s fully coated and let any excess drip off. -
Set the Cake Pops
Place the cake pops upright in a piece of floral foam or use cauldron-shaped containers to hold them while they set. -
Decorate
Once set, melt the black candy melts and drizzle them over the cake pops. Sprinkle with green sprinkles or edible glitter to finish. -
Allow to Set
Let the cake pops set completely before serving.
Tips for Success
- Cooling is Key: Ensure your cake is completely cooled before crumbling to prevent a mushy texture.
- Adjust Frosting: Add frosting a little at a time; too much can make the mixture too sticky.
- Use a Double Boiler: When melting candy coating, using a double boiler prevents burning.
- Manage Ambient Temperature: A cooler environment will help the cake pops set faster.
- Don’t Rush the Chilling: Allow the dipped cake pops to set properly; this improves the overall look and prevents melting.
Easy Variations
- Flavor Combinations: Try different cake and frosting flavors like lemon cake with raspberry frosting for a fruity twist.
- Dairy-Free Option: Use dairy-free frosting and chocolate coating for a suitable alternative.
- Add Ins: Mix in mini chocolate chips or nuts into the cake mixture for added texture.
- Spice It Up: Enhance the flavor with spices like cinnamon or nutmeg for a seasonal flair.
- Serving Styles: Instead of cake pops, form the mixture into small balls and serve as bite-sized treats.
What to Serve with Witches Cauldron Cake Pops
- Hot Chocolate: Perfect for a cozy pairing on cooler evenings, complementing the sweetness of the cake pops.
- Pumpkin Pie: The fall flavors of pumpkin combine well with the chocolate cake pops for a festive treat.
- Fruit Platter: Fresh fruit adds a refreshing contrast to the sweetness of the cake pops.
- Candy Apples: For a traditional Halloween treat, serve alongside candy apples for a playful contrast.
- Spooky Cocktails: Fun Halloween-themed drinks can elevate your party atmosphere.
Storage and Reheating
- Refrigerator Storage: Store leftover cake pops in the refrigerator for up to a week in an airtight container.
- Freezer Storage: For longer storage, freeze the uncoated cake balls in a single layer, then transfer to an airtight container for up to a month.
- Best Reheating Method: Cake pops are best enjoyed cold or at room temperature; avoid reheating in microwaves as it may alter the texture.
- Preserving Texture: Keep extras in a sealed container to maintain their moisture and prevent them from drying out.
Common Mistakes to Avoid
- Not Cooling Cake: Skipping the cooling step can lead to a mushy consistency.
- Overmixing: Be gentle when mixing cake and frosting to avoid a tough texture.
- Skipping Decoration: Incomplete coating or decorating can result in less appealing cake pops.
- Too Much Frosting: Adding too much frosting makes the mixture too sticky to shape properly.
- Wobbly Sticks: Ensure sticks are inserted deeply enough into cake balls to prevent them from falling off.
Witches Cauldron Cake Pops: Background & Cultural Inspiration
Originally a fun twist on traditional cake pops, these whimsical treats have gained popularity during Halloween due to their playful design and ease of preparation. The concept of cake pops transformed from simple birthday celebration cakes to a more interactive and festive dessert. The use of vibrant colors and festive decorations reflects a modern trend in customization, where bakers enjoy adding their personal flair. These cake pops are not just a treat but also embody the spirit of creativity and celebration typical during Halloween festivities.
Frequently Asked Questions
Can I use any cake mix flavor for this recipe?
Yes, choose any cake mix flavor that you enjoy; just ensure the frosting matches for a cohesive taste.
How long can I store the cake pops?
Cake pops can be stored in the refrigerator for up to a week or frozen for about a month.
Are there dairy-free options for this recipe?
Absolutely! Use dairy-free cake mix, frosting, and chocolate candy coating for a dairy-free version.
Can I make these in advance?
Yes, you can prepare cake pops a day or two in advance; just store them properly in the fridge until you’re ready to serve.
What can I do with leftover cake mix and frosting?
If you have extras, consider baking additional cupcakes or cookies, or simply store them for future baking.
Final Thoughts
Witches Cauldron Cake Pops are not only a delightful treat but also a fun project for both novice and experienced bakers. With the ability to customize flavors and designs, these cake pops will surely impress your guests at any gathering. So gather your ingredients, let your creativity flow, and enjoy crafting these spooky and delicious goodies!
PrintWitches Cauldron Cake Pops
Whimsical and delicious cake pops perfect for Halloween or any spooky celebration.
- Prep Time: 30 minutes
- Cook Time: 25 minutes
- Total Time: 55 minutes
- Yield: 12 cake pops
- Category: Dessert
- Method: Baking
- Cuisine: American
- Diet: Vegetarian
Ingredients
- 1 box of cake mix (any flavor)
- 1 cup frosting (matching the cake flavor)
- Chocolate candy coating
- Black candy melts
- Green sprinkles or edible glitter
- Cake pop sticks
- Small cauldron-shaped containers (optional)
Instructions
- Bake the cake according to the box instructions. Once done, allow it to cool completely.
- Crumble the cooled cake into a large bowl until it resembles fine crumbs.
- Add frosting gradually to the crumbled cake. Mix until the texture is moist enough to form into balls.
- Roll the mixture into small balls, about 1 inch in size, and place them on a baking sheet lined with parchment paper.
- Melt the chocolate candy coating according to the package instructions until smooth.
- Dip the end of each cake pop stick into the melted chocolate, then gently insert it into the center of a cake ball.
- Coat the entire cake ball into the melted chocolate, ensuring it’s fully coated and let any excess drip off.
- Place the cake pops upright in a piece of floral foam or use cauldron-shaped containers to hold them while they set.
- Once set, melt the black candy melts and drizzle them over the cake pops. Sprinkle with green sprinkles or edible glitter to finish.
- Let the cake pops set completely before serving.
Notes
Ensure the cake is completely cooled before crumbling to prevent a mushy texture. Adjust icing and flavors to taste.