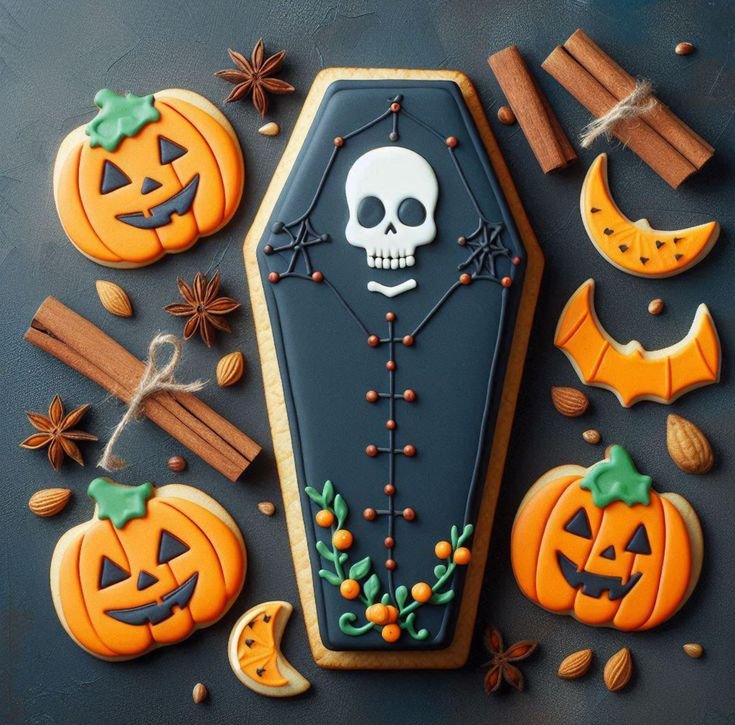
Skeleton Cookies with Royal Icing are a festive and fun treat that can bring a little spooky joy to any Halloween celebration. These cookies are not only adorable but also easy to make, making them a perfect project for both adults and kids. The combination of a soft sugar cookie base decorated with colorful royal icing makes this recipe stand out and adds a delightful touch to your holiday festivities.
Why You’ll Love Skeleton Cookies with Royal Icing
- Fun for All Ages: Decorating Skeleton Cookies is a great activity for families, allowing everyone to get creative with their designs. It’s a perfect bonding time for kids and adults alike.
- Customizable Designs: You can easily personalize the skeletons with different colors, expressions, and patterns, giving each cookie a unique appearance.
- Perfect for Parties: These cookies make delightful treats for Halloween parties, school events, or just a cozy afternoon at home. They are sure to be a hit wherever you take them.
- Delicious Flavor: The sugar cookies are tender and sweet, perfectly complementing the lightweight royal icing. Each bite is a satisfying blend of flavor and texture.
- Easy to Prepare: This recipe simplifies the process of making decorated cookies, making it accessible even for beginner bakers. Step-by-step instructions help ensure success.
Recipe Overview
- Prep Time: 30 minutes (not including cooling)
- Cook Time: 10-12 minutes
- Total Time: Approximately 2 hours (including cooling and decorating)
- Servings: 12-18 cookies (depending on size)
- Difficulty Level: Easy
Ingredients You’ll Need for Skeleton Cookies with Royal Icing
For the Sugar Cookies:
- 2 ¾ cups all-purpose flour: Provides structure and texture.
- 1 teaspoon baking powder: Helps the cookies rise.
- ½ teaspoon salt: Enhances flavor.
- 1 cup unsalted butter, softened: Creates a tender cookie.
- 1 cup granulated sugar: Sweetness is the key to these cookies.
- 1 large egg: Binds the ingredients together.
- 1 teaspoon vanilla extract: Adds a warm, flavorful note.
For the Royal Icing:
- 3 egg whites or 4 cups powdered sugar: They are the base for royal icing; egg whites give it a classic texture.
- 1 teaspoon lemon juice or vinegar: Helps stabilize the icing.
- Food coloring: For decorating your cookies to resemble spooky skeletons.
How to Make Skeleton Cookies with Royal Icing
-
Prepare the Dough: In a bowl, whisk together flour, baking powder, and salt. In another bowl, beat the softened butter and sugar until fluffy. Add the egg and vanilla, mixing well. Gradually add the dry ingredients to the wet mixture until combined.
-
Chill the Dough: Shape the dough into a disk, wrap in plastic wrap, and refrigerate for at least 1 hour (or overnight). This step is crucial for easy rolling.
-
Preheat Oven: Preheat your oven to 350°F (175°C), ensuring the temperature is just right for baking.
-
Roll and Cut: On a floured surface, roll out the chilled dough to about ¼-inch thick. Use cookie cutters to cut out skeleton shapes and transfer them to a baking sheet lined with parchment paper.
-
Bake: Bake the cookies for 10-12 minutes, or until the edges are lightly golden. Allow cooling on a wire rack.
-
Prepare Royal Icing: In a large bowl, beat the egg whites and gradually add powdered sugar until thick and shiny. Divide into small bowls and add food coloring as desired.
-
Decorate: Once the cookies are cool, use piping bags to outline and fill in the skeleton features. Let the icing dry before adding any additional details.
Tips for Success
- Chill the Dough: Not only does chilling the dough improve the texture, but it also makes it easier to cut shapes without them spreading.
- Use Parchment Paper: Line your baking sheets with parchment to prevent sticking and ensure even baking.
- Consistency of Icing: Adjust the royal icing’s consistency by adding water for flooding and more powdered sugar for detailing.
- Plan Your Designs: Sketch out your decorating ideas on paper before you start icing to ensure a smooth decorating process.
- Let Icing Dry Completely: Allow the royal icing to dry fully before stacking or packaging the cookies to avoid smudging.
Easy Variations
- Add Flavoring: Experiment with different extracts, such as almond or lemon, in your cookie dough for a unique taste.
- Chocolate Variation: Substitute half of the all-purpose flour for cocoa powder to create chocolate-flavored skeleton cookies.
- Dairy-Free Option: Use dairy-free butter alternatives in the cookie dough and opt for meringue powder instead of egg whites in the royal icing.
- Spice Up the Dough: Add a touch of cinnamon or nutmeg to the dough for a warm, autumn flavor.
- Different Shapes: Mix up the cookie shapes with other fun Halloween themes like bats or pumpkins.
What to Serve with Skeleton Cookies with Royal Icing
- Hot Chocolate: A warm cup of hot chocolate complements the sweetness of the cookies beautifully—perfect for chilly evenings.
- Apple Cider: The tartness of apple cider pairs nicely with the sweetness of the cookies, enhancing the autumn vibe.
- Milk: A classic choice, milk balances the sweetness of the cookies while adding a creamy texture.
- Halloween-Themed Desserts: Serve these cookies alongside themed cupcakes or brownies for an eye-catching dessert table.
- Fruit Plate: Fresh fruit, especially apples and grapes, can add a healthy contrast to the sugary treats.
Storage and Reheating
- Refrigerator Storage: Store decorated cookies in an airtight container in the refrigerator for up to 1 week.
- Freezer Storage: Unfrosted cookies can be frozen for up to 3 months. Thaw them at room temperature before decorating.
- Best Reheating Method: If you prefer warm cookies, reheat them in the oven at 300°F (150°C) for about 5-7 minutes.
- Preserving Texture: For best results, keep the cookies in a single layer to avoid sticking together.
- Meal Prep Note: Cookie dough can be prepared in advance and refrigerated for future decorating sessions.
Common Mistakes to Avoid
- Skipping the Chilling Step: Not chilling the dough may lead to cookies that spread too much during baking.
- Incorrect Icing Consistency: Icing that is too runny will not hold its shape, while icing that is too thick may crack when drying.
- Overbaking: Keep a close eye on baking times; overbaked cookies can become dry and lose their softness.
- Not Letting Icing Dry: Ensure royal icing sets completely; rushing can lead to smudged decorations.
- Using Fresh Egg Whites without Stabilizing: If using egg whites, ensure they are fresh and stable for best icing results.
Skeleton Cookies with Royal Icing: Background & Cultural Inspiration
Skeleton cookies are a creative intersection of culinary art and Halloween culture, drawing inspiration from Dia de los Muertos (Day of the Dead) traditions in Mexico. This holiday celebrates life and honors deceased loved ones with vibrant decorations, food, and sugar skulls, which are often intricately decorated. The incorporation of playful skeletons into Halloween treats reflects the celebration of life while adding a whimsical touch to the spooky season. Cookies decorated with royal icing allow bakers to express their artistic flair, bridging fun and tradition harmoniously. They remind us that while Halloween may be associated with fright, it can also be a joyous and creative occasion.
Frequently Asked Questions
What can I substitute for egg whites in the royal icing?
You can use meringue powder as a substitute for egg whites. Mix 1 tablespoon of meringue powder with 2 tablespoons of water to achieve a similar consistency.
How long do the skeleton cookies stay fresh?
When stored properly in an airtight container, decorated skeleton cookies can stay fresh for up to one week.
Can I make skeleton cookies ahead of time?
Absolutely! You can bake the cookies in advance and freeze them unfrosted. Decorate them closer to the time you plan to serve them.
How can I ensure my royal icing dries properly?
For best results, allow the royal icing to dry at room temperature away from moisture, covering them lightly to prevent dust.
What if my royal icing is too runny?
If your icing is too runny, add more powdered sugar, a tablespoon at a time, until it reaches the desired consistency for decorating.
Final Thoughts
Skeleton Cookies with Royal Icing are not only a delightful treat but also a great way to engage in some fun Halloween festivities. Their customizable nature allows for creativity, while their sweet, tender flavor is sure to please everyone. Whether you’re preparing them for a party or enjoying a cozy baking session at home, these cookies are worth the effort. Dive into this recipe and enjoy a sweet and spooky experience with your family and friends!
PrintSkeleton Cookies with Royal Icing

Fun and festive Skeleton Cookies decorated with colorful royal icing, perfect for Halloween celebrations.
- Prep Time: 30 minutes
- Cook Time: 12 minutes
- Total Time: 120 minutes
- Yield: 12-18 cookies
- Category: Dessert
- Method: Baking
- Cuisine: American
- Diet: Vegetarian
Ingredients
- 2 ¾ cups all-purpose flour
- 1 teaspoon baking powder
- ½ teaspoon salt
- 1 cup unsalted butter, softened
- 1 cup granulated sugar
- 1 large egg
- 1 teaspoon vanilla extract
- 3 egg whites or 4 cups powdered sugar
- 1 teaspoon lemon juice or vinegar
- Food coloring
Instructions
- Prepare the dough: In a bowl, whisk together flour, baking powder, and salt. In another bowl, beat the softened butter and sugar until fluffy. Add the egg and vanilla, mixing well. Gradually add the dry ingredients to the wet mixture until combined.
- Chill the dough: Shape the dough into a disk, wrap in plastic wrap, and refrigerate for at least 60 minutes.
- Preheat the oven: Preheat your oven to 350°F (175°C).
- Roll and cut: On a floured surface, roll out the chilled dough to about ¼-inch thick. Use cookie cutters to cut out skeleton shapes and transfer them to a baking sheet lined with parchment paper.
- Bake: Bake the cookies for 10-12 minutes, or until the edges are lightly golden. Allow cooling on a wire rack.
- Prepare royal icing: In a large bowl, beat the egg whites and gradually add powdered sugar until thick and shiny. Divide into small bowls and add food coloring as desired.
- Decorate: Once the cookies are cool, use piping bags to outline and fill in the skeleton features. Let the icing dry before adding any additional details.
Notes
Chill the dough to prevent spreading and use parchment paper for easy baking.