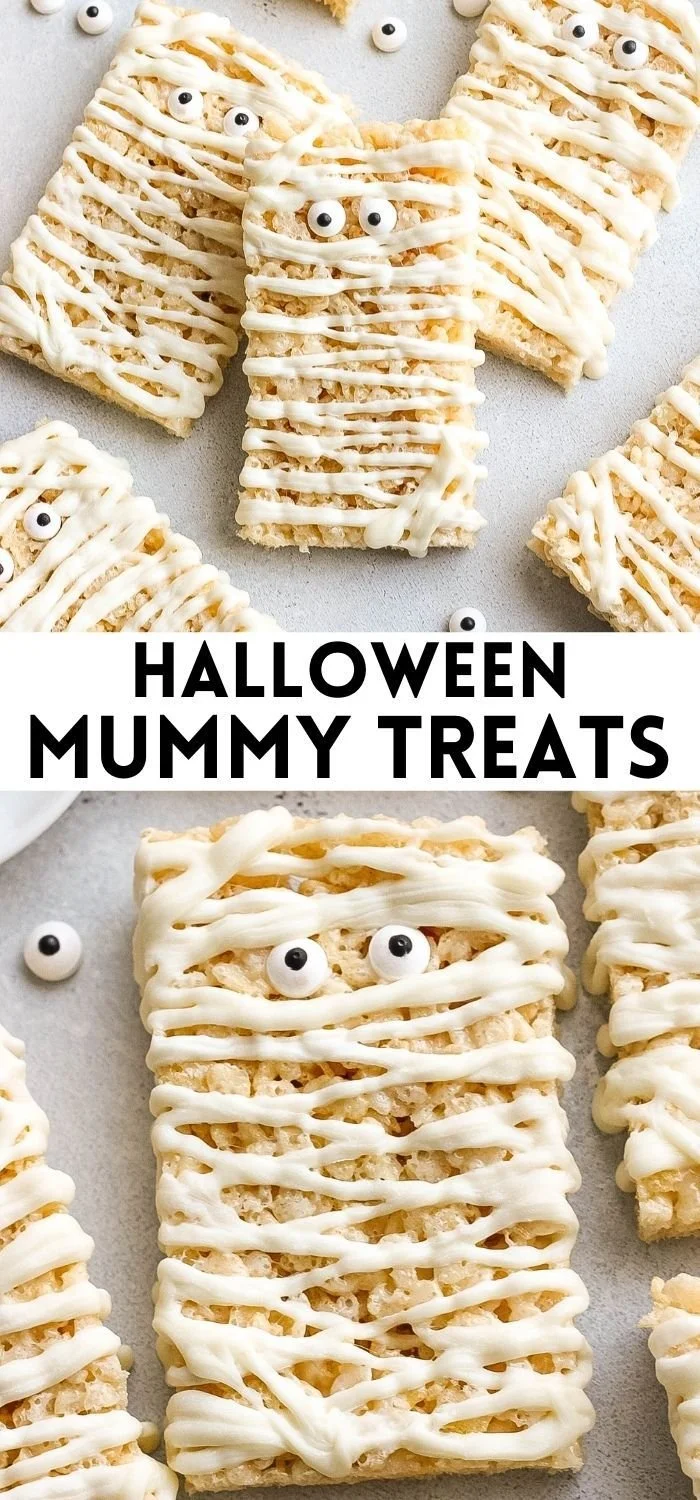
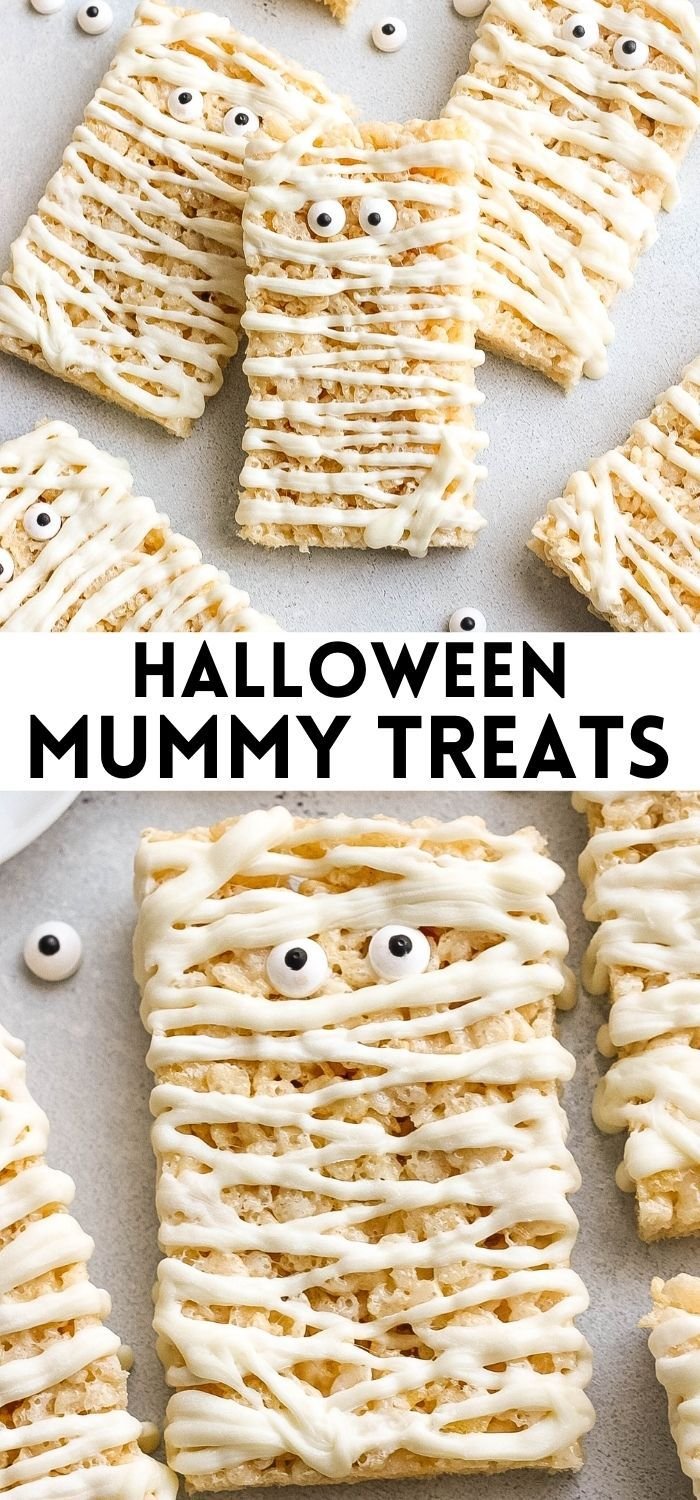
Halloween Mummy Treats are a delightful and festive treat that captures the spirit of the spooky season. These easy-to-make bars combine gooey marshmallows with crunchy Rice Krispies, topped off with a drizzle of creamy white chocolate and playful candy eyes. They’re perfect for Halloween parties, school events, or simply to enjoy at home while watching a movie.
Why You’ll Love Halloween Mummy Treats
- Quick and Easy: With just a handful of ingredients and a few steps, you’ll have spooky treats ready in no time – perfect for beginner cooks!
- Fun for Everyone: Children and adults alike will love these charming treats, making them ideal for parties or family gatherings.
- Customizable: You can easily modify the design or even the flavor, making them as unique as you want.
- No Baking Required: These treats come together without any need for the oven, keeping your kitchen cool and your cleanup minimal.
- Perfect for Meal Prep: Make a batch in advance and enjoy them throughout the Halloween season, letting you savor the spooky vibes.
Recipe Overview
- Prep Time: 10 minutes
- Cook Time: 5 minutes
- Total Time: 15 minutes
- Servings: 12
- Difficulty Level: Easy
Ingredients You’ll Need for Halloween Mummy Treats
-
Base Ingredients:
- 3 tablespoons butter: Provides richness and helps everything stick together.
- 1 package (10 oz.) mini marshmallows: The key ingredient that creates a sticky, sweet base.
- 6 cups Rice Krispies cereal: Adds crunch and texture to the treats.
-
Topping:
- 1 cup white chocolate chips: For drizzling, it adds a creamy taste and a mummy-like appearance.
-
Decorative Candy:
- Candy eyes: These make the treats fun and festive, giving them their “mummy” character.
How to Make Halloween Mummy Treats
-
Melt the Butter
- In a large saucepan over low heat, melt the butter. Stir occasionally to prevent burning.
-
Add the Marshmallows
- Once the butter is melted, add the mini marshmallows. Stir continuously until they are completely melted and smooth.
-
Mix in the Cereal
- Remove the saucepan from heat and add the Rice Krispies cereal. Stir until all the cereal pieces are coated in the marshmallow mixture.
-
Press into Pan
- Grease a 9×13 inch pan and evenly press the mixture into the pan. Use a spatula or your hands (lightly greased) to ensure it’s packed tightly.
-
Cool Completely
- Allow the mixture to cool completely in the pan, which may take about 30 minutes.
-
Melt the White Chocolate
- In a microwave-safe bowl, melt the white chocolate chips. Heat in 30-second intervals, stirring in between until smooth.
-
Drizzle the Chocolate
- Once melted, drizzle the white chocolate over the cooled treats to create a ‘mummy’ effect.
-
Add Candy Eyes
- Immediately place the candy eyes on top of the treats before the chocolate sets.
-
Serve and Enjoy!
- Once the chocolate hardens, cut into rectangles or squares, serve, and enjoy your spooky treats!
Tips for Success
- Do Not Rush Melting: Keep the heat low while melting the butter and marshmallows to prevent burning.
- Pack Tightly: When pressing the mixture into the pan, make sure to pack it tightly. This will ensure the treats hold together when cut.
- Use a Parchment Liner: For easy removal of the treats, consider lining the pan with parchment paper before pressing in the mixture.
- Experiment with Toppings: Feel free to add sprinkles or other candy pieces for extra flair and texture.
- Check Chocolate Consistency: If the white chocolate becomes too thick while melting, add a teaspoon of vegetable oil to make it easier to drizzle.
Easy Variations
- Chocolate Drizzle: Swap out the white chocolate for milk or dark chocolate for a richer taste.
- Add a Flavor Twist: Incorporate a teaspoon of vanilla extract or almond extract into the marshmallow mixture for added flavor.
- Fruit Addition: Mix in some mini chocolate chips or chopped nuts to the base mixture for an extra twist.
- Halloween Colors: Use colored chocolate melts instead of white chocolate to make the treats match your Halloween color scheme.
- Use Different Cereals: Swap Rice Krispies for Fruity Pebbles for a colorful and fruity version.
What to Serve with Halloween Mummy Treats
- Apple Slices with Caramel: A crisp contrast to the treats, dipped in caramel for a sweet bite.
- Pumpkin Spice Cookies: Keep the Halloween theme going with soft and spiced cookies.
- Chocolate Milk or Hot Cocoa: A creamy drink that pairs beautifully with the sweet treats.
- Ghostly Cupcakes: Serve alongside ghost-themed cupcakes for a fun and festive dessert table.
- Cheese and Crackers: Balances the sweetness of the treats with a savory option for a well-rounded platter.
Storage and Reheating
- Refrigerator Storage: Keep the treats in an airtight container at room temperature for up to a week. They can also be refrigerated, but let them come back to room temperature before serving for the best texture.
- Freezer Storage: They can be stored in the freezer for up to three months. Wrap each piece in plastic wrap and then place in a freezer bag.
- Reheating: Fridge-stored treats can be served cold or left out to reach room temperature. For frozen treats, let thaw in the refrigerator or at room temperature.
- Preserve Texture: Ensure that the treats are tightly wrapped to prevent them from becoming stale.
Common Mistakes to Avoid
- Burning the Mixture: Using high heat or not stirring properly can lead to burnt marshmallows; keep the heat low and mix well.
- Not Pressing Firmly: Failing to pack the mixture tightly results in crumbly treats that break apart easily.
- Overheating the White Chocolate: Melting the chocolate too quickly can lead to clumping. Use a microwave with care and stir gradually.
- Skipping the Cooling Step: Cutting the treats too soon will make them sticky and hard to slice; patience is key.
- Ignoring Storage Tips: Keeping the treats uncovered can lead to them becoming hard and losing their chewy texture.
Halloween Mummy Treats: Background & Cultural Inspiration
Halloween Mummy Treats draw inspiration from the classic Halloween imagery of mummies and tombs. Historically, Halloween has evolved from ancient Celtic festivals and harvest celebrations into a day filled with costumes, candy, and spooky fun. The tradition of creating festive treats like these cereal bars brings families together, encouraging creativity and enjoyment in crafting seasonal snacks. Additionally, the contrasting textures of crispy cereal and creamy chocolate play a vital role in creating a deliciously memorable treat that keeps the spirit of Halloween alive.
Frequently Asked Questions
Can I use regular marshmallows instead of mini marshmallows?
Yes, you can use regular-sized marshmallows. Just use about 4 cups and melt them down as usual.
How long will the treats last?
Halloween Mummy Treats will last up to a week at room temperature if stored in an airtight container.
Can these be made in advance?
Absolutely! They can be made a few days in advance, making them convenient for parties or gatherings.
How do I prevent sticking when pressing into the pan?
Lightly greasing your hands or using a greased spatula helps press the mixture down without it sticking.
What can I use in place of white chocolate?
You can substitute the white chocolate with milk chocolate or dark chocolate if you prefer a different flavor.
Final Thoughts
These Halloween Mummy Treats are a fantastic way to celebrate the spooky season while enjoying a fun and easy recipe. With just a few ingredients and minimal effort, you can create a delicious treat that’s sure to delight both kids and adults alike. Whether for a Halloween gathering or a simple family snack, these mummy treats are a must-try. Enjoy crafting these spooky snacks, and let the Halloween festivities begin!