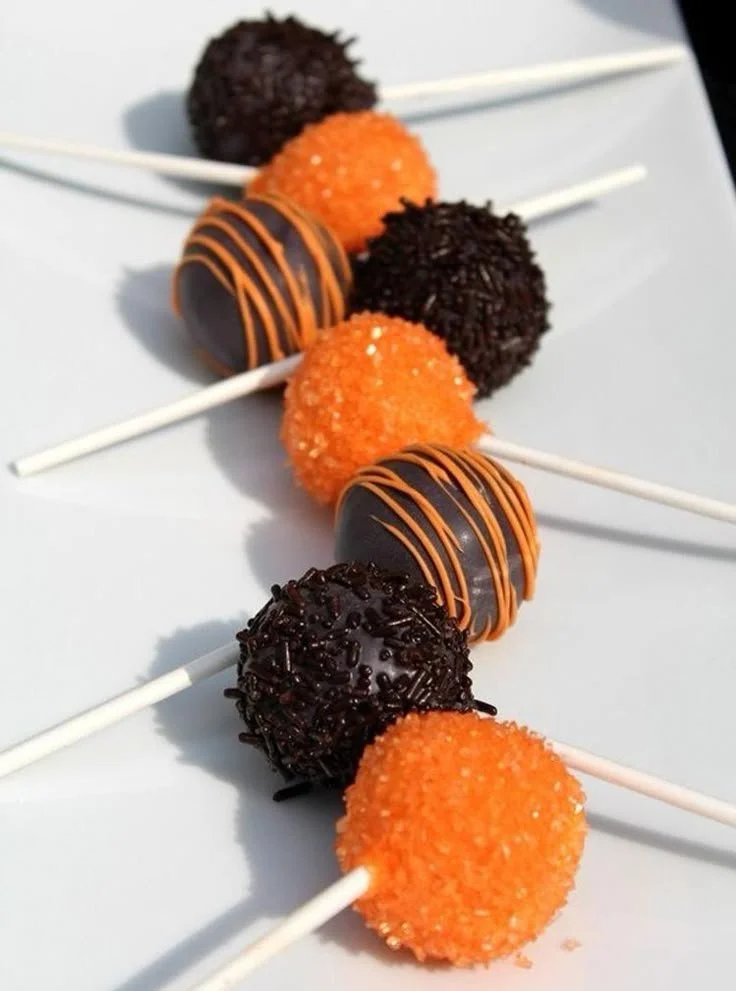
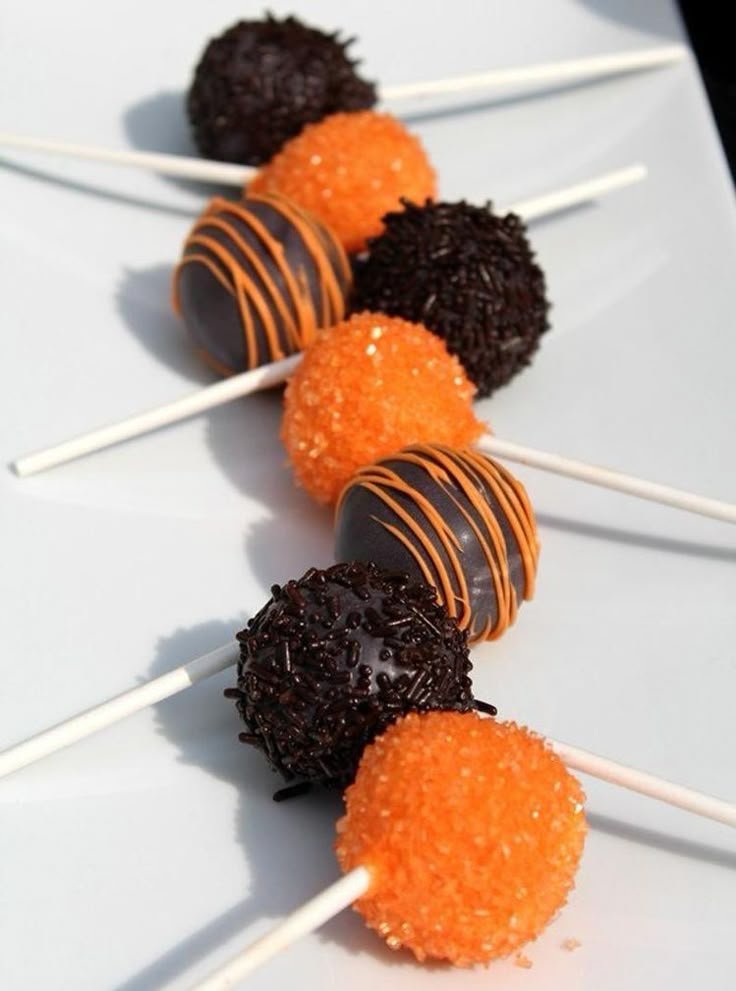
Halloween is just around the corner, and these Halloween Cake Pops are the perfect treat to celebrate the spooky season. Fun to make, these festive pops are a delightful mix of cake and frosting, dipped in chocolate and decorated to look like eerie ghouls, pumpkins, or ghosts. They’re a fantastic way to engage kids in the kitchen while creating deliciously cute treats that impress guests.
Why You’ll Love Halloween Cake Pops
- Engaging Activity for Kids: Making these cake pops is a fun way to get the little ones involved in the kitchen, letting them unleash their creativity with decorating.
- Customizable Flavors and Decorations: You can choose your favorite cake flavor and icing combination, then decorate these pops in countless ways to fit your Halloween theme.
- Perfect for Any Occasion: While they’re designed for Halloween, these cake pops can be adapted for birthday parties, themed events, or cozy gatherings with friends.
- Easy to Transport: Cake pops are portable, making them a great choice for parties, potlucks, and school events. They’re less messy than traditional cake, plus they fit easily into a snack bag.
- Deliciously Fun: Who can resist a popsicle-sized cake covered in chocolate? These treats are a great flavor and texture experience that appeals to all ages.
Recipe Overview
- Prep Time: 30 minutes
- Cook Time: 30 minutes
- Total Time: 1 hour
- Servings: About 24 pops
- Difficulty Level: Moderate
Ingredients You’ll Need for Halloween Cake Pops
- For the Cake:
- 1 box of cake mix (any flavor you prefer)
- Ingredients required by the box (usually eggs, water, and oil)
- For the Frosting:
- 1 can of store-bought frosting (about 16 oz), or homemade frosting
- For Dipping:
- 2 cups chocolate candy melts (preferably orange and black for Halloween)
- For Decorating:
- Sprinkles (Halloween-themed)
- Edible eyes
- Lollipop sticks or similar (6 inches long)
- Optional:
- Food coloring (for tinting the frosting)
- Flavored extracts (like vanilla or almond)
How to Make Halloween Cake Pops
1. Bake the Cake
Preheat your oven according to the cake mix instructions. Prepare the cake batter by combining the mix with the required ingredients (eggs, water, oil). Bake in a greased cake pan for the time specified on the box or until a toothpick inserted in the middle comes out clean.
2. Crumble the Cake
Once the cake has cooled completely, crumble it into a large mixing bowl. You want to break it into fine crumbs for easier mixing.
3. Mix in Frosting
Add half of the frosting (about 8 oz) to the cake crumbs and mix until fully combined. It should be moist but not overly wet. If it’s too dry, gradually add more frosting until the mixture holds together.
4. Form the Pops
Scoop out about 1 tablespoon of the mixture and roll it into a ball (about the size of a golf ball). Place the formed balls on a baking sheet lined with parchment paper. Repeat until all the mixture is used.
5. Chill the Cake Balls
Refrigerate the cake balls for at least 30 minutes or until firm. Chilling helps them hold their shape when dipped in chocolate.
6. Prepare for Dipping
Melt the chocolate candy melts in a microwave-safe bowl according to the package instructions. Dip the end of each lollipop stick into the melted chocolate, then insert it halfway into each chilled cake ball to help keep it secure.
7. Dip the Cake Pops
Once the sticks are securely in place, dip each cake pop into the melted chocolate, swirling to coat fully. Allow excess chocolate to drip off.
8. Decorate
While the chocolate is still wet, decorate your pops with Halloween sprinkles, edible eyes, or other decorations as desired. Place the dipped cake pops upright in a cake pop stand, styrofoam block, or a deep container filled with rice while the chocolate hardens.
9. Final Chill
Let the pops chill again until the chocolate is completely set. This usually takes about 15 minutes.
Tips for Success
- Use a Digital Scale: For consistent sizing, weigh your cake balls. This ensures uniform pops and even baking.
- Adjust Chocolate Melting: If the candy melts are too thick, add a small amount of shortening to thin it out for better dipping.
- Don’t Skip the Chill: Chilling the cake balls before dipping helps them retain their shape and allows the chocolate to coat evenly.
- Experiment with Flavors: Feel free to mix flavored extracts into your frosting or adjust the cake mix to add variety.
Easy Variations
- Different Cake Flavors: Swap the cake mix for chocolate, red velvet, or even spice cake for a unique flavor profile.
- Alternative Coatings: Use colored white chocolate or even a chocolate ganache for dipping.
- Themed Decorations: Create zombie or monster pops using colored chocolate and fondant decorations.
- Mini Cake Pops: Make smaller versions by using a teaspoon of cake mix for a bite-sized treat.
What to Serve with Halloween Cake Pops
- Spooky Fruit Platter: Pair these with a festive fruit platter featuring oranges and bananas styled like pumpkins and ghosts.
- Hot Apple Cider: Enjoy these sweet treats alongside warm drinks for a cozy fall affair.
- Halloween Cookies: Serve with sugar cookies decorated as bats or witches for a complete dessert table.
- Goblins’ Granola Bars: Offer a healthier snack option alongside for a balance between indulgence and nutrition.
Storage and Reheating
- Refrigerator Storage: Store leftover cake pops in an airtight container in the fridge for up to a week.
- Freezer Storage: Freeze uncoated cake balls for up to 3 months; just thaw before dipping.
- Best Reheating Method: If desired, put leftover cake pops in the microwave in short intervals to warm them gently without melting the chocolate.
- Meal Prep Note: Make cake balls ahead of time and dip them closer to your event for freshness.
Common Mistakes to Avoid
- Overmixing the Dough: Mixing the cake crumbs and frosting too much can lead to a gummy texture.
- Soggy Pops: Use the right amount of frosting—too much will make the cake balls soggy and hard to dip.
- Skipping the Cooling Process: Not chilling the cake balls can result in misshapen pops when dipped in the chocolate.
Halloween Cake Pops: Background & Cultural Inspiration
Halloween cake pops are a delightful spin on traditional cake, borrowing from the seasonal creativity that defines Halloween. Cake pops became popular in the early 2000s, often seen at parties and events due to their fun appearance and versatility. Decorated to fit the spooky theme, they can mimic iconic symbols of Halloween, like pumpkins and ghosts, while catering to all age groups, making them a festive favorite. These treats are not only a product of American culture but also have global influences, incorporating various flavors and decorations based on traditional sweets.
Frequently Asked Questions
Can I make these cake pops ahead of time?
Yes, you can prepare the cake balls well in advance and refrigerate them. Dip them in chocolate closer to your event for the best texture.
What can I substitute for chocolate melts?
If you don’t have chocolate melts, you can use tempered chocolate, which provides a similar coating with a different flavor profile.
How can I adjust the sweetness of the cake pops?
You can use a less sweet cake mix or add flavors like almond extract to balance the sweetness of the frosting and chocolate.
Are these cake pops gluten-free?
Yes, you can use gluten-free cake mix and icing to make your Halloween cake pops suitable for gluten-free diets.
What’s the best way to melt chocolate?
Use a microwave in short intervals or a double boiler to gently melt chocolate while stirring frequently for even melting.
Final Thoughts
These Halloween Cake Pops are a delightful and festive way to celebrate the spooky season. Fun to make and delicious to eat, they can be easily customized to fit any theme or preference. Whether you’re hosting a party or simply getting into the Halloween spirit, these cake pops are sure to enchant those around you. Embrace the creativity and enjoy the process because, in the end, it’s all about the joy of baking and sharing!
PrintHalloween Cake Pops

Festive and fun Halloween Cake Pops made with cake and frosting, dipped in chocolate and decorated for the spooky season.
- Prep Time: 30 minutes
- Cook Time: 30 minutes
- Total Time: 60 minutes
- Yield: 24 pops
- Category: Dessert
- Method: Baking
- Cuisine: American
- Diet: Vegetarian
Ingredients
- 1 box of cake mix (any flavor you prefer)
- Ingredients required by the box (usually eggs, water, and oil)
- 1 can of store-bought frosting (about 16 oz), or homemade frosting
- 2 cups chocolate candy melts (preferably orange and black for Halloween)
- Sprinkles (Halloween-themed)
- Edible eyes
- Lollipop sticks or similar (6 inches long)
- Food coloring (for tinting the frosting, optional)
- Flavored extracts (like vanilla or almond, optional)
Instructions
- Bake the Cake: Preheat your oven according to the cake mix instructions. Prepare the cake batter by combining the mix with the required ingredients (eggs, water, oil). Bake in a greased cake pan for the time specified on the box or until a toothpick inserted in the middle comes out clean.
- Crumble the Cake: Once the cake has cooled completely, crumble it into a large mixing bowl. You want to break it into fine crumbs for easier mixing.
- Mix in Frosting: Add half of the frosting (about 8 oz) to the cake crumbs and mix until fully combined. It should be moist but not overly wet. If it’s too dry, gradually add more frosting until the mixture holds together.
- Form the Pops: Scoop out about 1 tablespoon of the mixture and roll it into a ball (about the size of a golf ball). Place the formed balls on a baking sheet lined with parchment paper. Repeat until all the mixture is used.
- Chill the Cake Balls: Refrigerate the cake balls for at least 30 minutes or until firm.
- Prepare for Dipping: Melt the chocolate candy melts in a microwave-safe bowl according to the package instructions. Dip the end of each lollipop stick into the melted chocolate, then insert it halfway into each chilled cake ball.
- Dip the Cake Pops: Once the sticks are securely in place, dip each cake pop into the melted chocolate, swirling to coat fully. Allow excess chocolate to drip off.
- Decorate: While the chocolate is still wet, decorate your pops with Halloween sprinkles, edible eyes, or other decorations as desired. Place the dipped cake pops upright in a cake pop stand, styrofoam block, or a deep container filled with rice.
- Final Chill: Let the pops chill again until the chocolate is completely set, about 15 minutes.
Notes
Use a digital scale for consistent sizing of cake balls and experiment with different flavors and decorations.