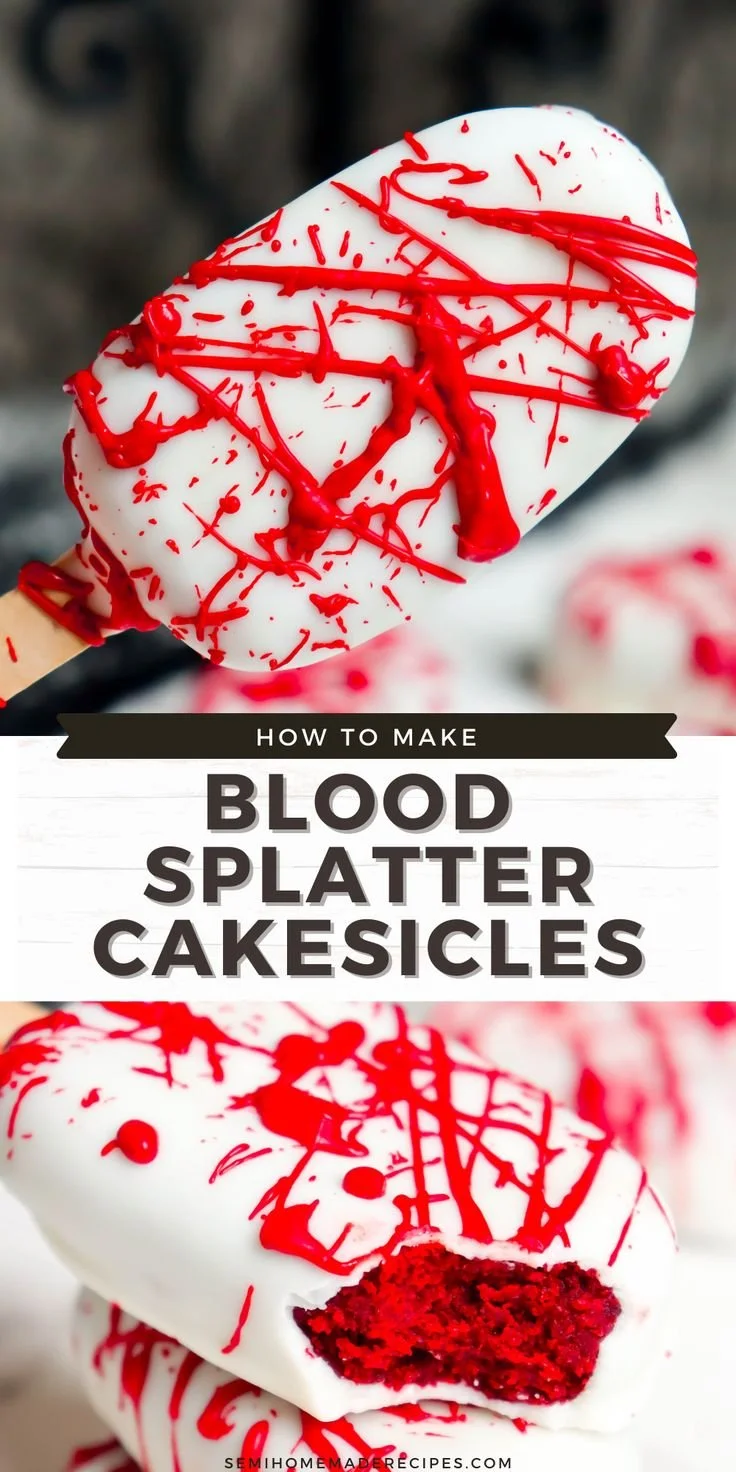
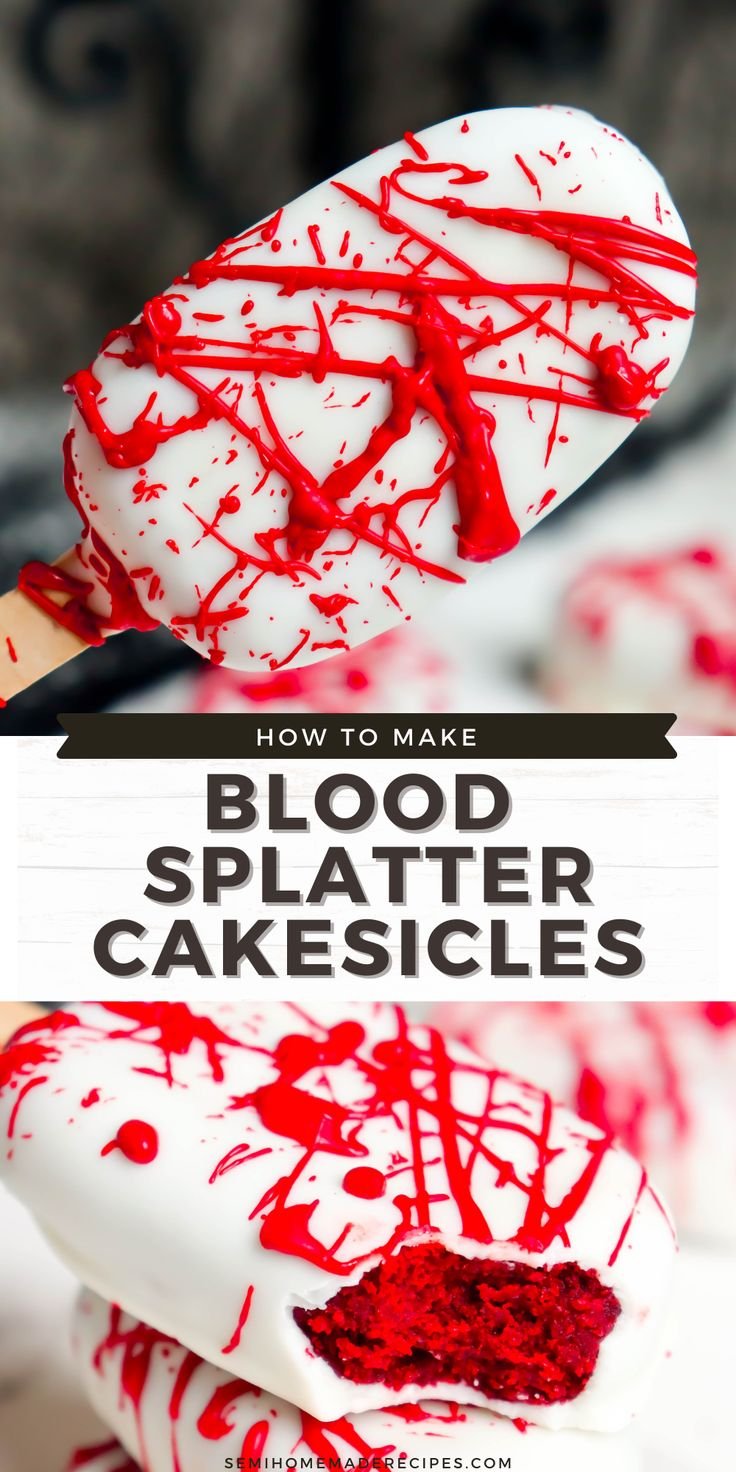
Creepy Halloween Blood Splatter Cakesicles are the perfect festive treat for your Halloween celebrations. These delightful, spooky desserts not only impress with their eerie appearance but also offer a deliciously sweet flavor. Perfect for parties or a fun treat at home, they’re surprisingly easy to make and sure to be a hit with both kids and adults alike.
Why You’ll Love Creepy Halloween Blood Splatter Cakesicles
- Fun and Festive: These cakesicles are a unique addition to your Halloween festivities, making them perfect for parties and gatherings.
- Customizable: You can personalize the flavors, colors, and decorations, allowing for creativity and fun.
- Deliciously Confectionary: Made with moist cake and creamy coating, they offer a rich dessert experience that dessert lovers will enjoy.
- Easily Portable: These treats are perfect for taking along to parties or potlucks without worrying about mess.
- Simple to Make: Even beginner home cooks can follow along, making it a fun activity to do with friends or family.
Recipe Overview
- Prep Time: 30 minutes
- Cook Time: 30 minutes
- Total Time: 1 hour
- Servings: 10 cakesicles
- Difficulty Level: Easy
Ingredients You’ll Need for Creepy Halloween Blood Splatter Cakesicles
- For the Cake Mixture:
- 1 box of chocolate cake mix (use any flavor you prefer)
- Eggs (as required by the cake mix instructions)
- Vegetable oil (as required by the cake mix instructions)
- Water (as required by the cake mix instructions)
- For the Coating:
- 2 cups chocolate candy melts (or white chocolate melts for a different base)
- Red gel food coloring
- For Decorating:
- Lollipop sticks or popsicle sticks
- Halloween-themed sprinkles (optional)
How to Make Creepy Halloween Blood Splatter Cakesicles
-
Bake the Cake: Follow the instructions on the cake mix box. Preheat your oven and prepare the cake batter using eggs, oil, and water as directed. Bake according to the time specified, then let cool completely.
-
Crumble the Cake: Once the cake is cool, crumble it into a large bowl until there are no large chunks remaining. The texture should resemble fine crumbs.
-
Mix with Frosting: Add about ½ cup of frosting to the crumbled cake. Mix well with your hands or a spatula until the mixture is moist and holds together when pressed.
-
Shape the Cakesicles: Using your hands, form the cake mixture into log shapes, about the size of a popsicle. Insert a lollipop stick into each log and place them on a parchment-lined tray.
-
Chill the Cakesicles: Place the tray in the refrigerator for about 30 minutes to allow the cakesicles to firm up.
-
Melt the Coating: In a microwave-safe bowl, melt the chocolate candy melts according to the package instructions. Stir until smooth and shiny.
-
Add Color: To create the blood splatter effect, add a few drops of red gel food coloring to the melted chocolate and stir until evenly combined.
-
Dip the Cakesicles: Remove the cakesicles from the refrigerator. Dip each one into the melted chocolate, allowing excess to drip off.
-
Create the Splatter Effect: Using a spoon, drizzle additional red chocolate over the coated cakesicles to mimic blood splatters. This gives a fun and spooky effect.
-
Set the Coating: Place the completed cakesicles back on the parchment-lined tray. Allow them to set at room temperature or in the fridge until the chocolate hardens.
Tips for Success
- Proper Chilling: Ensure the crumbled cake mixture is well chilled before dipping; this will help the cakesicle hold its shape.
- Use Quality Melts: Opt for high-quality candy melts for better flavor and smoother texture.
- Experiment with Flavors: Try using flavored frosting or cake mixes to add unique flavors.
- Be Creative: Use different colors of candy melts for various festive occasions to match themes.
- Keep It Mess-Free: Use a deep bowl for dipping to minimize mess and ensure even coating.
Easy Variations
- Flavor Swaps: Use red velvet cake instead of chocolate for a colorful twist.
- Dairy-Free Option: Substitute with dairy-free chocolate melts and vegan cake mix/frosting.
- Add Ingredients: Include mini chocolate chips or nuts in the cake mixture for added texture.
- Alternate Colors: Make a green “witches’ brew” version using green candy melts and add green sprinkles.
What to Serve with Creepy Halloween Blood Splatter Cakesicles
- Milk: A classic pairing, milk complements the sweetness of the cakesicles nicely.
- Hot Chocolate: Serve warm hot chocolate for a cozy dessert experience.
- Halloween Punch: A fruit-based punch or mocktail enhances the festive atmosphere.
- Other Treats: Combine with cookies or other spooky-themed desserts for a full dessert spread.
Storage and Reheating
- Refrigerator Storage: Store cakesicles in an airtight container in the refrigerator for up to 5 days.
- Freezer Storage: Cakesicles can be frozen. Place them in a single layer until firm, then transfer to an airtight container for up to 3 months.
- Reheating: Serve cold or allow to sit at room temperature for a few minutes before enjoying. Do not microwave to preserve the coating texture.
Common Mistakes to Avoid
- Not Chilling Enough: Avoid skipping the chilling step; it’s crucial for the cakesicles to hold shape during coating.
- Overheating Chocolate: Be careful not to overheat the chocolate when melting, as it can burn easily.
- Too Much Frosting: Adding too much frosting can make the mixture overly soggy, leading to difficulty in shaping.
- Skipping the Parchment: Always line your tray with parchment paper to prevent sticking and make cleanup easier.
Creepy Halloween Blood Splatter Cakesicles: Background & Cultural Inspiration
Cakesicles draw inspiration from traditional popsicles, merging the idea of cake and ice pops into a fun, portable dessert. Serving spooky treats during Halloween is a long-established tradition, with various cultures embracing themed foods that highlight creativity. The concept of “blood” splatter not only fits the festive theme but also plays with playful horror, perfect for captivating both kids and adult audiences alike.
Frequently Asked Questions
Can I use store-bought cake instead of making my own?
Yes, you can use pre-made cake from the bakery, just crumble it up and mix with frosting as directed.
What kind of food coloring should I use for the splatter effect?
Gel food coloring is recommended, as it provides vibrant color without altering the chocolate’s consistency.
Can I prepare these cakesicles in advance?
Absolutely! You can make them a day or two ahead of your Halloween celebration and store them in the refrigerator.
How do I prevent my coating from cracking?
Ensure the cakesicles are cold before dipping and avoid overheating the chocolate.
What if I have leftover coating?
You can use the leftover chocolate for drizzling on other desserts, or let it cool and eat it as chocolate bark.
Final Thoughts
Creepy Halloween Blood Splatter Cakesicles are a fun, creative treat that will make your Halloween celebrations even more special. Easy to prepare and utterly enjoyable, they are perfect for anyone looking to add a touch of spooky charm to their dessert table. Gather your ingredients and let your creativity run wild this Halloween season!
PrintCreepy Halloween Blood Splatter Cakesicles

Delightful and spooky desserts perfect for Halloween celebrations, these cakesicles are easy to make and sure to impress both kids and adults.
- Prep Time: 30 minutes
- Cook Time: 30 minutes
- Total Time: 60 minutes
- Yield: 10 cakesicles
- Category: Dessert
- Method: Baking
- Cuisine: American
- Diet: Vegetarian
Ingredients
- 1 box chocolate cake mix (use any flavor you prefer)
- Eggs (as required by the cake mix instructions)
- Vegetable oil (as required by the cake mix instructions)
- Water (as required by the cake mix instructions)
- 2 cups chocolate candy melts (or white chocolate melts for a different base)
- Red gel food coloring
- Lollipop sticks or popsicle sticks
- Halloween-themed sprinkles (optional)
Instructions
- Bake the cake: Follow the instructions on the cake mix box. Preheat your oven and prepare the cake batter using eggs, oil, and water as directed. Bake according to the time specified, then let cool completely.
- Crumble the cake: Once the cake is cool, crumble it into a large bowl until there are no large chunks remaining. The texture should resemble fine crumbs.
- Mix with frosting: Add about ½ cup of frosting to the crumbled cake. Mix well with your hands or a spatula until the mixture is moist and holds together when pressed.
- Shape the cakesicles: Using your hands, form the cake mixture into log shapes, about the size of a popsicle. Insert a lollipop stick into each log and place them on a parchment-lined tray.
- Chill the cakesicles: Place the tray in the refrigerator for about 30 minutes to allow the cakesicles to firm up.
- Melt the coating: In a microwave-safe bowl, melt the chocolate candy melts according to the package instructions. Stir until smooth and shiny.
- Add color: To create the blood splatter effect, add a few drops of red gel food coloring to the melted chocolate and stir until evenly combined.
- Dip the cakesicles: Remove the cakesicles from the refrigerator. Dip each one into the melted chocolate, allowing excess to drip off.
- Create the splatter effect: Using a spoon, drizzle additional red chocolate over the coated cakesicles to mimic blood splatters. This gives a fun and spooky effect.
- Set the coating: Place the completed cakesicles back on the parchment-lined tray. Allow them to set at room temperature or in the fridge until the chocolate hardens.
Notes
These cakesicles can be made in advance and stored in the refrigerator. Experiment with flavors and colors for different festive occasions.