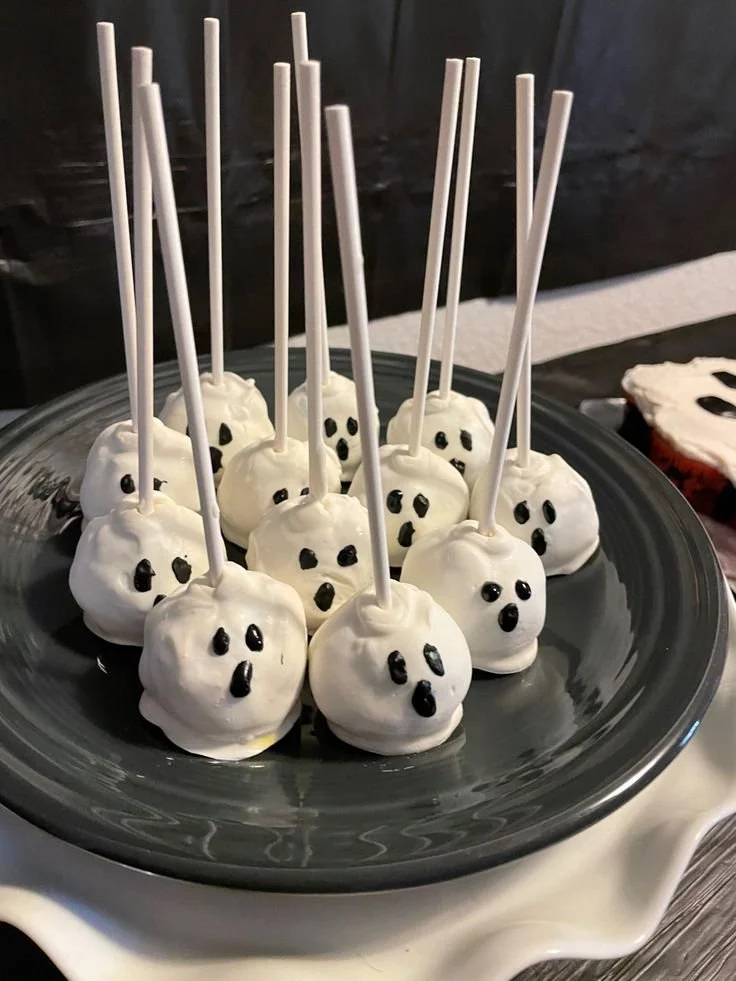
If you’re looking to add a fun twist to your baking repertoire, these cake pops are just the treat you need! Perfect for parties, a sweet snack, or simply a delightful treat to make with family, cake pops are easy to customize and taste fantastic. They offer a little bit of nostalgia while remaining a favorite among kids and adults alike.
Why You’ll Love Cake Pops
- Easy to Make: Using a simple box cake mix streamlines the process, making it accessible even for beginner bakers.
- Customizable: You can tailor the flavors and decorations to suit any occasion, from birthdays to holidays.
- Party-Friendly: These treats are perfect for gatherings—they’re portable and can be enjoyed on the go!
- Fun for Kids: Making cake pops can be a fun activity for children, allowing them to get creative with decorations.
- Gorgeous Presentation: Their colorful coating and decoration make cake pops a visual treat, perfect for impressing guests.
Recipe Overview
- Prep Time: 20 minutes
- Cook Time: 30 minutes
- Total Time: 50 minutes (plus 30 minutes of freezing)
- Servings: 12 pops
- Difficulty Level: Easy
Ingredients You’ll Need for Cake Pops
- Cake Base:
- 1 box cake mix (any flavor)
- Ingredients for cake as per the box instructions (usually eggs, oil, water)
- Frosting:
- 1 cup frosting (store-bought or homemade)
- Coating:
- Candy melts or white chocolate (for dipping)
- Other Supplies:
- Lollipop sticks
- Black icing or chocolate (for decoration)
- Sprinkles (optional, for additional decoration)
How to Make Cake Pops
- Bake the Cake: Prepare the cake according to the instructions on the box. Once baked, let it cool completely.
- Crumble the Cake: In a large bowl, crumble the cooled cake into fine pieces.
- Mix with Frosting: Add the frosting to the crumbled cake. Mix until the mixture is moist enough to hold together when formed into balls.
- Shape the Pops: Take small portions of the mixture and roll them into balls. Place them onto a baking sheet lined with parchment paper.
- Insert Sticks: Gently insert a lollipop stick into each ball, making sure it goes in about halfway. Place the sheet in the freezer for about 30 minutes.
- Melt the Coating: In a microwave-safe bowl or double boiler, melt the candy melts or white chocolate until smooth.
- Dip the Cake Pops: Take each chilled cake ball and dip it into the melted coating, ensuring it is fully covered. Let any excess coating drip off.
- Set the Pops: Place the coated pops upright in a stand or a block of Styrofoam to allow the coating to set properly.
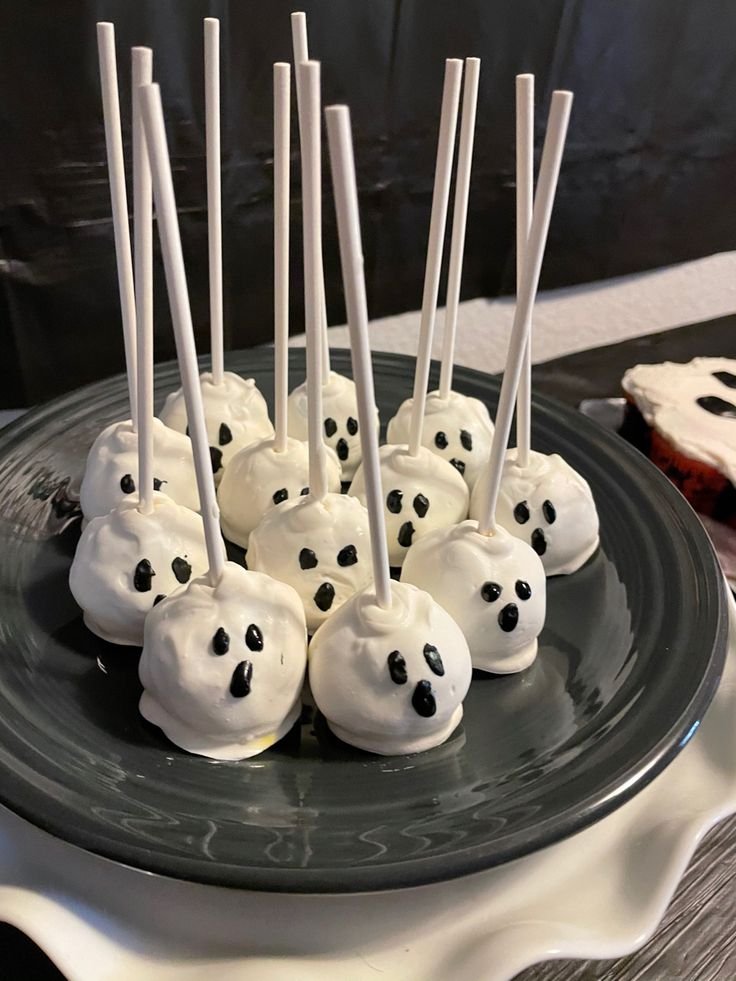
- Decorate: Once the coating has set, use black icing to draw ghostly eyes and mouths on the pops for a spooky touch.
- Add Sprinkles: If desired, sprinkle the pops with colorful sprinkles for an extra festive look.
Tips for Success
- Cooling the Cake: Ensure that the cake is completely cooled to help the pops hold their shape when rolled.
- Texture Check: After mixing frosting with the cake, the mixture should be moist but not too sticky. Adjust the frosting if needed.
- Chill Before Coating: Chilling the cake balls helps maintain their shape during the dipping process. Don’t skip this step!
- Coating Technique: When dipping, gently swirl the pop in the coating to achieve an even layer, and be sure to let excess drip back into the bowl.
Easy Variations
- Flavor Swaps: Experiment with different box cake flavors like red velvet, lemon, or chocolate for unique pops.
- Dairy-Free Option: Use dairy-free frosting and chocolate to make these suitable for those with dietary restrictions.
- Decorative Themes: For holidays (e.g., Halloween), use colored chocolate melts and themed sprinkles to match the occasion.
- Nut Add-Ins: Fold in finely chopped nuts or chocolate chips to the cake mixture for added texture and flavor.
- Filling Surprise: Consider adding a small amount of jam or fruit puree inside the cake balls for a surprise burst of flavor.
What to Serve with Cake Pops
- Fresh Fruit: Serve with sliced strawberries or oranges for a refreshing contrast to the sweetness.
- Hot Beverage: Pair with coffee or hot chocolate for a warm and cozy treat.
- Milkshake: A creamy milkshake complements the fun, handheld cake pops perfectly.
- Ice Cream: Offer a scoop of ice cream alongside for an indulgent dessert experience.
- Themed Snacks: Include other themed snacks if serving at a party (like cookies or cupcakes) to create a fun dessert table.
Storage and Reheating
- Refrigerator Storage: Store leftover cake pops in an airtight container in the fridge for up to one week.
- Freezer Storage: To freeze, place them in a single layer in a freezer-safe container; they can last up to three months. Thaw in the fridge before enjoying.
- Reheating: There’s no need to reheat cake pops, but if they need warming, let them sit at room temperature for a few minutes.
Common Mistakes to Avoid
- Overbaking the Cake: Make sure to bake the cake just until done to avoid a dry mixture for the pops.
- Too Much Frosting: Adding too much frosting can make the mixture overly gooey and difficult to work with.
- Not Freezing Long Enough: If the cake pops aren’t frozen long enough, they can fall off the sticks when dipped.
- Rushing the Coating: Dipping when the cake pops are too warm can cause the coating to separate.
Cake Pops: Background & Cultural Inspiration
Cake pops originated in the United States and have become a popular treat at celebrations and bakeries. These delightful snacks bring together the nostalgia of birthday cake with the fun of handheld sweets. While variations exist across cultures, the concept of combining baked goods and candy resonates universally, making cake pops a beloved choice for gatherings and events worldwide.
Frequently Asked Questions
Can I use a homemade cake?
Absolutely! Homemade cake works just as well as box cake for these pops.
How do I know when the coating is ready?
The coating should be smooth and melted without any clumps. Stir until it’s a consistent liquid before dipping.
Can I freeze the uncoated cake balls?
Yes, you can freeze the shaped cake balls before dipping them. Just thaw before coating.
What if my cake pops are falling off the sticks?
This could be due to the mixture being too moist or not freezing the cake balls long enough. Adjust your method, and ensure a solid chill before dipping.
How do I make them more festive?
Use vibrant colored coatings, themed sprinkles, or even edible glitter to make your cake pops stand out for any occasion.
Final Thoughts
Making cake pops is a fun and rewarding way to get creative in the kitchen. With their ease of preparation and delightful flavor, these treats are perfect for any celebration or just a sweet snack at home. Give this recipe a try, and enjoy the smiles they bring!
PrintDelicious Cake Pops
Fun and customizable cake pops that are perfect for parties and celebrations.
- Prep Time: 20 minutes
- Cook Time: 30 minutes
- Total Time: 50 minutes
- Yield: 12 pops
- Category: Dessert
- Method: Baking
- Cuisine: American
- Diet: Vegetarian
Ingredients
- 1 box cake mix (any flavor)
- Ingredients for cake as per the box instructions (usually eggs, oil, water)
- 1 cup frosting (store-bought or homemade)
- Candy melts or white chocolate (for dipping)
- Lollipop sticks
- Black icing or chocolate (for decoration)
- Sprinkles (optional, for additional decoration)
Instructions
- Bake the cake according to the instructions on the box. Once baked, let it cool completely.
- Crumble the cooled cake into fine pieces in a large bowl.
- Mix the frosting with the crumbled cake until it holds together when formed into balls.
- Shape the mixture into small balls and place them on a baking sheet lined with parchment paper.
- Insert a lollipop stick into each ball, going about halfway in. Freeze for 30 minutes.
- Melt the candy melts or white chocolate until smooth in a bowl.
- Dip each chilled cake ball into the coating, ensuring it’s fully covered. Let excess drip off.
- Set the coated pops upright in a stand or Styrofoam block to let the coating set.
- Decorate with black icing for spooky effects once set.
- Add colorful sprinkles for a festive look if desired.
Notes
Ensure the cake is completely cooled before crumbling. Chill the cake balls well before coating to maintain their shape.